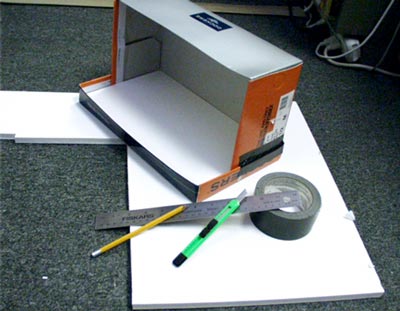
 Here’s your basic shoebox diorama set up. We have reinforced the bottom with a piece of foamboard. We have also duct-taped the box to the box top. Kids, duct tape is an invaluable product and is the answer to many of life’s problems. If you learn only one thing today let it be that duct tape is your friend.
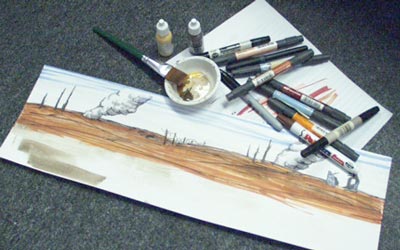 This is the background we drew with pencil, makers and a little brown paint. We lightly sketched it out with pencil and then applied marker and the paint. Don’t worry about erasing the pencil – you really won’t be able to see it under the paint and marker.
 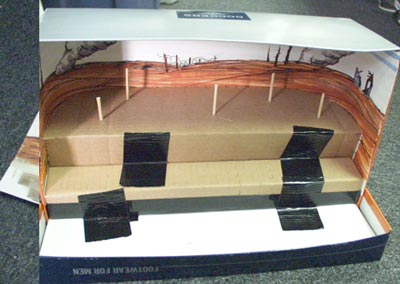 Now we’ve fitted the background to the diorama in a gentle arch and attached it with – duct tape! Inside we have fitted some cardboard boxes and taped them down as well. And any cardboard boxes will do, like old cereal or cracker boxes. We have poked wooden BBQ skewers through the top for barbed wire posts.
  Here we’ve put our plaster cloth over the cardboard and duct tape. You can also see where we’ve taped down a ridge of newspaper through the barb wire posts and plastered that as well.
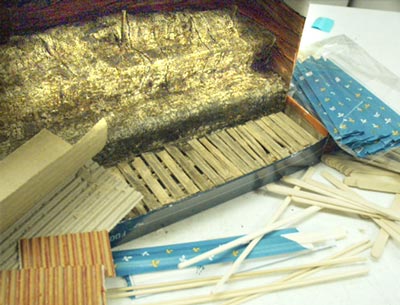 This is the plaster after a quick wash of brown paint. Later we will apply some of our water/white glue mixture and sprinkle on some fine sand and dirt. For the wooden walkway in the bottom of the trench we cut up some popsicle sticks at irregular sizes and painted them as well. We also peeled back some card board and used our markers to make some rusty corrugated metal for the trench side walls. We like to use popsicle sticks, BBQ skewers and even bamboo chopsticks for most of our wooden elements. You can find them at most dollar stores along with a lot of other great modeling stuff. Just use you imagination! Finally we strung bead wire between the posts for the barbed wire and painted it a rust color.
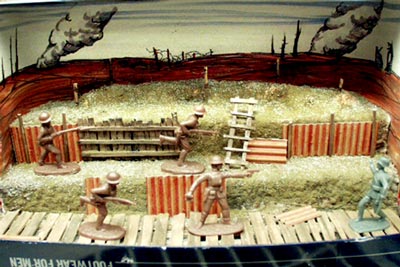 Here we see the finished product. Note the soldiers we chose are not painted and the project still looks good. But it’s not finished yet. A couple simple paragraphs explaining what the viewer is looking at will go a long way to getting you that all important “A”. Below is our paper on The Trenches of World War I.
Because of advances in technology like the machine gun and artillery the soldiers of World War I were forced to dig deep trenches. These offered some protection from gun fire and exploding shells. The trenches ran all the way across Europe from Switzerland to the English Channel. Sometimes enemy trenches were 100 yards apart, sometimes only ten. In between them was called “no man’s land” because it was occupied by no one. The typical trench was at least 10 feet deep. On one side there was a “firing step” that a soldier could use to see over the top of the trench and shoot at the enemy. Because much of the trench was uncovered it was often wet with rain. At the bottom of the trench was a wooden walkway called a duckboard and was supposed to keep the soldiers feet dry but it didn't always work. The sides of the trench were walled or shored-up with wooden boards or corrugated metal. The trench was a miserable place to live. It was cold in the winter, hot in the summer and always infected with rats and insects that fed of the dead bodies that seemed to be everywhere.
This scene depicts an event called a “trench raid” where one side would sneak across no man’s land in order to capture prisoners in order to get information on troop strengths or movements.